Batching your work with theme weeks (+Free Printable)

Batching your work is a really popular concept right now, but how to batch process practically can be tricky to figure out.
As a solopreneur or small business owner, it's easy to get overwhelmed with all of the hats you have to wear. You're in charge of marketing, sales, offering products or services, the copywriting, finances, customer service, support, on and on and on. That can be really tough on your focus and productivity because so many different areas are needing your attention at the same time.
I'm always on the lookout for a way to work smarter so I attempted to ease this stress and cut multitasking by batching.
Batching On A Weekly Rotation
I divided up my workload into the core areas and assigned a week for each to focus ONLY on that type of work. I batch process enough projects in that week so that I don't have to worry about that area again until the next month. By batching and keeping everything on a weekly rotation, it's much easier to keep up without becoming a stressed out workaholic.
It also really helps to move the needle forward in each area because you're focused and purposeful, not scattered.
Want to give it a try? Here's how it works in detail...
1. Choose your themes to batch
The first thing to decide is what are the major areas of your business? Where do you spend the most time? Try to narrow this list to 4-6 areas/themes. Think about it in terms of how much you're able to get done in a week. Could you do six weeks worth of work for that area to last you six weeks? If not, maybe it would be wiser to do 4 themes/4 weeks.
I originally tried to do a 6-week rotation but felt it was hard to produce 6 weeks of work at one time. So then I cut it down.
My major themes are:
Admin, Design, Content, Service
2. Assign Themes to a Week
Prioritize the major areas and assign them to a week. What order do you need these to be in for you to have peace of mind? For example, I would have a hard time spending time on social media if I felt like the designs for my shop were not done yet. So I make sure to make the content week comes after my design week.
If a month has 5 weeks, I also add a catch up theme for things I just could not get done. This is totally optional but it helps me to keep from stressing if unexpected things come up.
Week 1: Design (Creating products for my shop)
Week 2: Content (Blog, Filling up Tailwind for Pinterest & Plann for Instagram)
Week 3: Client Work (Custom design projects)
Week 4: Administration (Upkeep, Recordkeeping, Finances)
Week 5: Catch up (optional)
3. Assign Goals for Each Theme
Think out what is actually possible to do within that week's time. This keeps that tendency to overwork in check. It's probably not reasonable for me to do 20 blog posts in a week. But it is reasonable for me to write 4, one post for each week. So think through each area and what is actually possible and realistic for your schedule.
1. Design Products - My Goal: 4 new products
2. Blog & Social Media - My Goal: 4 blog posts, 6 weeks of social media scheduled,
3. Client Work - My Goal: 10 hours of service-based design
4. Administration - My Goal: Monthly finances & reports, shop maintenance
Week 5: Catch up - Example Goals: Photoshoot, art direction, newsletter, etc.
4. Schedule Tasks
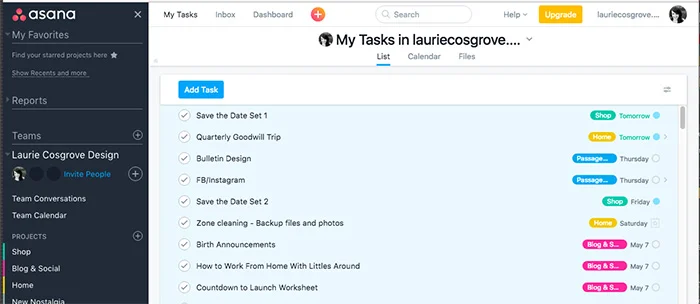
One of the ways I keep everything moving along and working efficiently is to schedule out my goal tasks. I use Asana to plan out what's coming up. For example, if I have a goal to write 4 blog posts in the coming week, I add those 4 blog post ideas into Asana with a deadline for that specific week.
It's also helpful to add a "next up" task list so that when that focus area week rolls around again, you'll remember where to get started or follow up.

5. Streamline and Eliminate Waste
A major bonus from trying this system is I quickly realized what was wasting my time and what was actually possible for the time I had.
One example is that at first I dedicated a whole week to social media and a whole separate week to blogging. Then I realized I could be more reasonable with how often I was posting. I then challenged myself to get faster in each area.
For example, I tested if it was possible get a post done in 4 hours. Then 2 hours? 1 hour? 30 minutes? I streamlined the process and now write 3-4 posts in 2 hours. What I was spending a good chunk of my time on was cut down to one day of work.
Streamlining some of those processes freed me up to focus on other areas. Play around with your timing and find ways you can tweak, automate or delegate your work to be more efficient.
Tips
Don't be too hard on yourself in the beginning. The first couple of months I tried this, I really struggled to get everything done that I wanted to. I still am always refining and figuring out where I can make things work better or what elements of my work are totally unnecessary.
Ready to get started with batching your work on a weekly rotation? There's a printable in the Free Resource Library to help you get started!

Want to feel on top of your content? Check out the One-Year Content Planner in the shop!